The nice thing about having a very technical hobby like FPV or something similar is that the better you get at building your drones or repairing your drones the more fearless you become at fixing other stuff like these pair of Marshall Major III headphones that I got for my wife for Christmas 2019 I think. It was way before the pandemic so it has signs of wear and tear. The PU leather of the headbands and the ear pads really need replacing. The bad thing about these headphones is that you have to de-solder the wires just to get all of these old stuff old pads out, and I was trying to look for a tutorial on YouTube on how to do that. There were a couple of videos but they weren’t really that much helpful or weren’t that much clearer so that’s what we’re going to do today. It’s not too technical but I think this is going to be a useful video for a lot of people who have these pair of headphones or similar Marshall headphones.
First we need to remove the ear pads by turning it counterclockwise and do that for both ears. Next we need to remove this headband part by pushing on these copper thingies (just the left side will do, but you can also remove the right one if it makes working on the headphones easier).
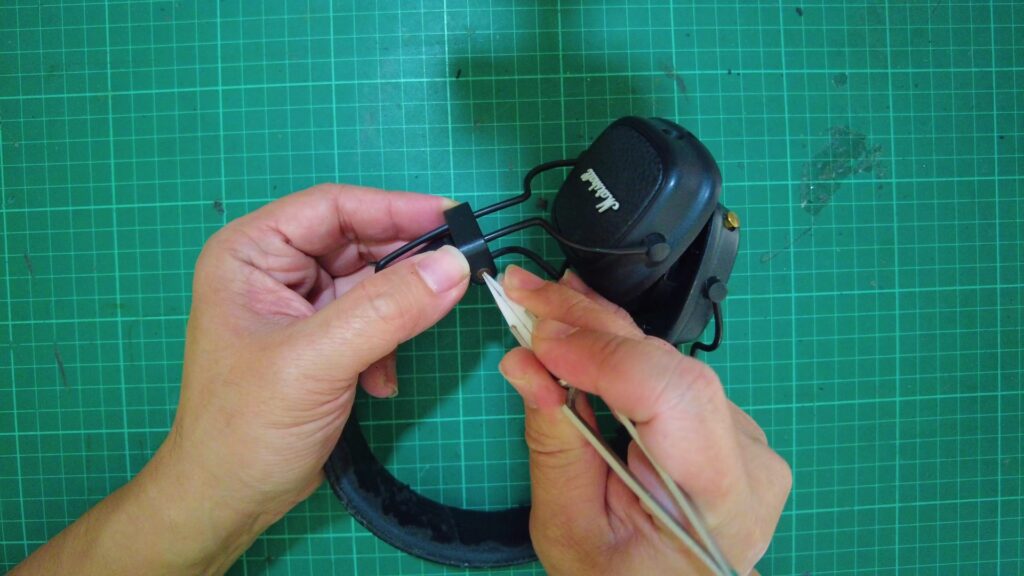
Next we’re going to unscrew the screws on the left side. I think we still need to remove most of the components from the inside like this control board as well as the battery so as you can see the wires are just all of them are soldered onto the board. The wire is also connected to this small board which is connected to the button on the left and we just need to pop this plastic thing up. The first time we do it it might be a little harder because there is a lock there but you just gently pop it up and it should be fine.
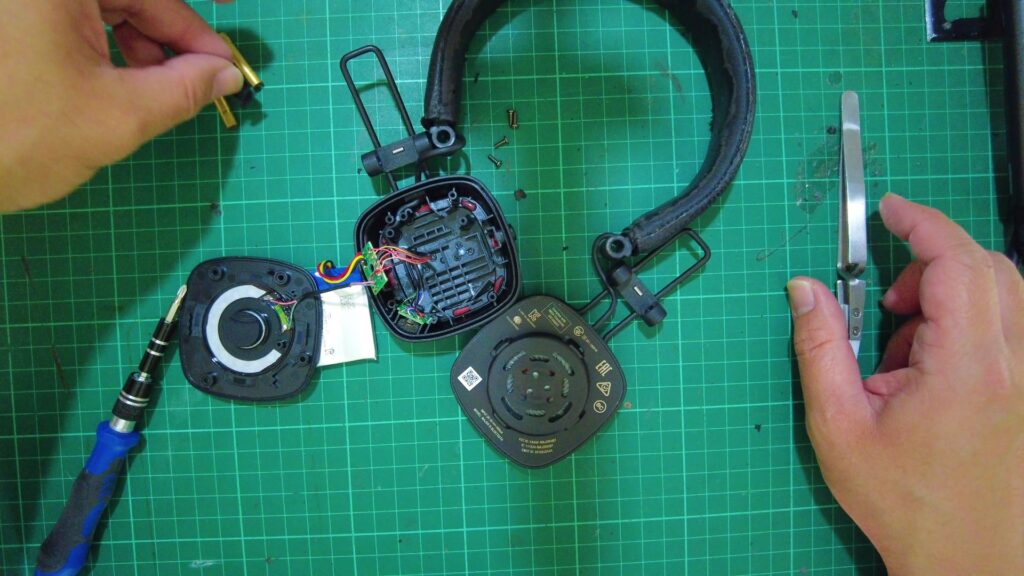
Now pull all the wires out. Putting them back in is going to be another matter but we’ll worry about that later. It’s a little bit tight so we might have to get these things out one by one which makes it easier.
Just make sure that you don’t snap anything.
Now we have our new replacement headband; it has the Marshall logo written on the center and it also has left and right indicated on the sides. We’re just going to wrap the wires with tape so it’s easier to move in through the headband. If you have a long cylindrical object like this paintbrush or maybe a pen or a hard straw then you can also use that to help guide the wires through the hole. Now we just slide this whole thing inside and it’s easier to push. Just keep pushing till you reach the other side and now you can just start pulling from the other side as well. Once you get the headband through the worst is over, and we can just start putting this back.
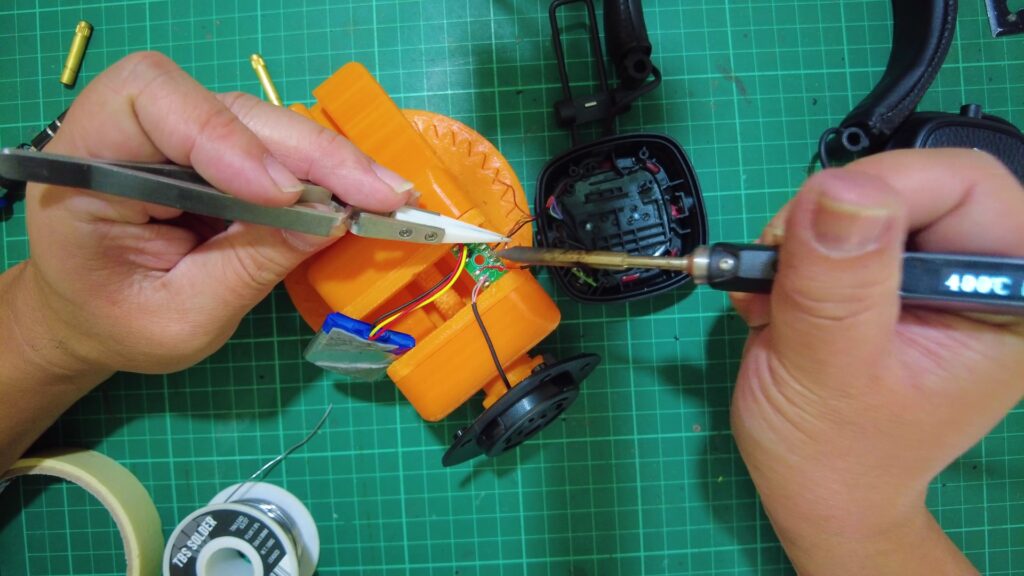
We need to push the wires through the hole again and you can twist them together so that they go in easier. Solder all the wires to the boards in the same way, and put the battery back in. Once that’s done we can now close this up and put these copper thingies back in to the holes, and just screw the new earpads clockwise. So now we have this new looking pair of Marshall major III headphones. All of the rubber and PU leather parts have been replaced. All that’s left to do is give this to my wife.
And there you have it! Now my wife has an almost new Marshall Major III headphones or at least it looks like a new or refurbished pair. So this isn’t the usual content that I post here because this channel is normally for FPV drones and FPV flying and everything about it. But I hope this was useful to whoever is reading this. Other videos/guides out there showed how to replace these things but uh didn’t really explain the process in much detail so I hope this was useful to some of you. If you’re here on the channel you might as well check out my other videos and make sure you hit the like button if you liked this video and if you’re not yet subscribed to this channel please do so as well.
You can buy the replacement parts here:
Earpads
Amazon
Aliexpress
Lazada
Headband
Amazon
Aliexpress
Lazada


