For those of you who want to start out at photography, these are my suggestions on what gear you should buy, and of course subjectively-based on my experience. If you want to know more about my gear, just click on the thumbnail.
Digicam
 If you already have a digicam, that’s all you need to get started. There’s no need to go higher than 5 megapixels. Leave that high-pixel job to an SLR. If your camera has 5-megapixels or higher, there’s no need to drool everytime a newer camera comes out with a megapixel more camera resolution, no matter what that salesman might say. And if all you’re gonna take are family snaps or anything general, you won’t even need 5-megapixels, but if you’re looking to start out at photography and you already have a 5-megapixel digicam, that’s all you really need.
Even if you have a fancy D3, you’ll still want a pocket-able digicam for those situations where lugging around your big, bad DSLR would not be ideal. While I do recommend that you bring your main camera everywhere, the point is to always have a camera, any camera, with you. It will make the difference between shooting an “ok” photo or no photo at all. Of course, you don’t get as much control, and a 5-megapixel digicam can only produce half of the MPs that a D200 can give, but that really doesn’t matter when I’m just printing 8x10s.
Going the SLR Way
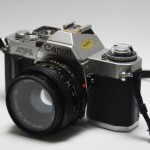
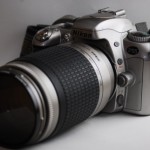 If you’re like most amateur photographers, money is a precious rare commodity. I would recommend that if you are just starting out with photography, go buy yourself a film camera. If you buy a basic film SLR it will cost you a fraction of the cost of a D40x, allow you to hone your technique and teach you the discipline of the shot. While it’s perfectly OK to fine-tune your shot with the LCD, rich amateurs (or kids with rich parents) with a really expensive digicam can easily be spotted. And you really don’t want to fall into that same group.
Now many of you are thinking, “but I’m going to be taking a lot of bad shots, and film will burn a hole in your wallet.” Well, that’s the part that will ensure disciplined shooting and making sure you know what you’re doing before you take a shot. Forget fancy on-the-edge experimental shots for the moment and focus on the basics. And if you want to save on cost, don’t buy professional film just yet, unless you’ve graduated into that. Buy consumer ISO 100 film and just shoot. Don’t have it all printed either. Just have them developed to a contact print, or better yet to a CD. A roll of ISO100 will cost you less than P100 and the CD transfer is around the same price. It will take you around at least 100 rolls of film to warrant the cost of a D40x. And that’s one roll per CD. If you have your film developed en masse, they can put 2 maybe 3 rolls on a single disc, saving you more money. DSLRs also depreciate quite quickly, and you wouldn’t to wear out your hard-earned DSLR on practice.
Time to go Digital?
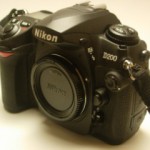
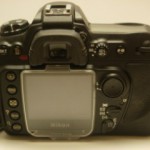 Only you can decide that. If you’ve got money to burn, by all means jump right in. If not, bide your time and money and get more experience. The next question will be what DSLR to buy. Don’t bother asking me a Nikon vs. Canon question, I’d recommend a Nikon for personal preference.
My D200, which I bought for myself with my hard-earned money. If you haven’t read about it yet, read about my purchase here. The D200 is just a great camera to have. It’s exposure meter is great, it has a nice big LCD, controls big enough to use even with gloves, and a built-in flash that can be used as a commander unit to a limitless number of slave CLS flash units. While I wouldn’t recommend this for a beginner (you’ll be wasting your money on an expensive D200, and you’ll be wearing out your D200 while learning as well), it’s a great camera for those who have had experience with film or one of it’s brothers like the D40 and D80. Heck, if you have money to burn, beginners, please buy this camera as well. Both it’s newer brothers, the D300 and D700, are excellent cameras and pack even more features into its sturdy body.
Tripod
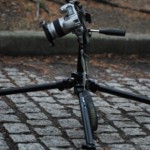
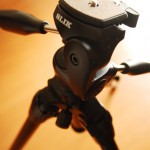 You need a tripod.
I could end with that, but I will try to explain further. A tripod will enable you to take steady shots where hand-holding your camera will incur blur.That said, you need to know how to use your tripod as tool and not as a crutch; learn when to use it, and when not to. Get a tripod with a quick-release lever (most do anyway), so when the situation arises, you can quickly remove your camera and run. A spirit meter is also an added bonus. To those of you who don’t know what this is, it’s that little piece of glass with water and a bubble inside to help you see if your tripod is level. Great if you have it, but sometimes it’s better to rely on your mind’s eye through the viewfinder. Whether the horizon should be level or not should be up to you. Also, weight is another consideration. While a light tripod will allow you to travel light, the heavier ones are sturdier.
Lenses
If you can buy a camera kit, get a camera kit. That is, if you don’t have a camera body already. You’ll save a little bit than shopping for a separate lens. But if you already have a some lenses, don’t bother buying a kit unless the kit lens is really good (like the 18-200mm VR kit lens for example, or the kit lens with the D90). Also, consider if the lenses you already have are compatible with your new camera body. There are some who would argue that the kit lenses suck. They don’t really suck, they’re just not good as the more expensive ones. But of course! Duh! Point is, if you already have a few lenses, you won’t want a kit lens. But if you’re just going to buy your first SLR, get a kit.
Wide-to-Medium Lenses
Most basic kits have these lenses, varying in degrees. Some will have the 28-85mm like my F55D film camera, while other kits may offer you 18-135mm. For starting out, there’s no need to blow your budget with more powerful kit lenses. Save it for a better investment. The wide-to-medium-zoom range of these lenses will be adequate for 80% of the situations you’ll encounter, covering landscapes, cityscapes, portraiture, still photography, street photography, basically most anything.
Telephoto Zoom LensesIf you’re into the 20% of the situations that the wide-to-medium zoom lenses can’t cover, you can get a 70-300mm F4/5.6 G lens really cheap. This is perfect for candid shots or outdoor sports, but at F5.6 at maximum zoom it will be quite slow for indoor sports shooting.
Super Zoom Lenses
These lenses cover both the aboved mentioned lenses’ capabilities, like the 18-200mm AF-S VR lens. The advantage of these is that you can bring one lens instead of two or three. But it comes at a bit of a cost. My advice, if you already have a wide-to-medium zoom lens, stick with it until you can buy one of these. If lens changes doesn’t matter and you want to go the cheaper route, go get the two lenses I mentioned above. No VR though, but you’ll have your tripod for these long zooms anyway.
Prime Lenses
Once you’ve covered your desired focal range with any of the lenses above, you’re gonna want to get some higher-quality lenses. Prime lenses are fixed lenses, so you can’t zoom in or out. However, they come cheap, have wide apertures, and take really sharp pictures. You can start of with a normal lens like 50mm or 85mm prime lens. If you’re going to take portraits or fashion shoots or anything even close to a commercial shoot, throw away your kit lens and put a prime lens on. Either of Canon’s or Nikon’s 50mm 1.8 lenses are really really cheap. The Nikkor 50mm 1.4D will give you only an extra 2/3 stop of aperture and in terms of sharpness, is about as sharp as the 1.8, but the price difference is quite huge (Y10K or P5K). On the other hand, if the tech and performance is what you want, you can’t go wrong with the 1.4.
Cokin filters
A lot of people don’t like Cokin filters because they’re made of plastic, instead of glass, and as such, easy to get scratched. I say, take care of your stuff. And even if it gets scratched, it’s cheap enough to easily replace. The advantage of using Cokin filters system is that is independent from your lens diameter. With traditional screw-in filters, you’ll have to buy each and every filter for each and every lens that you own. But with Cokin filters, you just have to buy the holder, the right lens adapter, and you can use your filters on just about any lens you have.
Cokin P-Series filter holder and lens adapter rings
This is the first thing you need to have to start out with Cokin filters. Why the P-series? Well the A- is restrictively small and will cause vignetting with wide-angle lenses and is quite limited to smaller lens diameters. The X-pro series however, is a tad too large, and much less common than the P-series. Now that you have P-series filter holder, you need to buy a lens adapter (it’s cheap) for whatever lens you have. And when you buy a new lens, you don’t need to buy your filter set all over again, just the adapter ring and the filter holder will happily slide in with your new lens.
Gradual neutral-gray Filter
When you’re going on a budget, go with a gradual gray filter. Some may argue that a circular polarizer would be more useful. Unfortunately, it’s about 4-5 times more expensive (You can buy a gradual grey, warming filter, a filter holder, and a lens adapter and the polarizer would still be more expensive). A gradual grey filter is just about as useful, and will open you up to a lot of creative possibilities. What is it use for? Say for example you want to take a picture of a beautiful coastal scene. On a sunny day, you’d normally get washed out skies and uninteresting clouds. But with a gradual gray filter, you can keep the beach at the proper exposure, while making the sky a stop or two lower.
Circular Polarizer
If you have a digital camera, this will be your next filter purchase. The circular polarizer acts to block out reflections and haze from your shots by polarizing the light that goes through your lens. In simple words, your skies will look bluer, your seas will be clearer, your foliage greener, and your glasses will have less reflections. The circular polarizer also acts as a neutral-density filter since it’s about 2-stops darker.
Warming Filter
In the age of film, warming filters was one of the more important filter considerations you’d make to make your photos richer. With digital, you can get buy fiddling with your balance, nevertheless the warming filter can still give you that extra “warm” feel if your creativity demands it. Since it’s cheaper than the gradual grey filter, I’d urge you to go get one for those just in cases.
Lights
When you’re just starting out, you’d be ok just practicing and mastering shooting in available light (and I do recommend you master that first). Eventually, you’ll want to be able to control the light on your subject through flashes or strobes and light modifiers. While some cameras do have a built-in flash, most of the time you should stay away from using it, or use it only on manual and at very low-power fill. On-camera flash isn’t very pleasing to the subject. The quality of light is more important than the quantity of light.
Small FlashesHot-shoe flash, Speedlights, strobes, or simply flash. They all mean the same thing; a portable flash that attaches to the top of your SLR. When you’ve gotten the hang of shooting natural-light, you will want to consider purchasing a strobe. If you don’t think you’re ready to handle flash-lit photos or if you can’t afford them yet, not to worry. You can always hide behind the “I prefer to shoot natural light” excuse. A lot of people do.
One compelling reason to use a dedicated flash instead of the built-in flash in most cameras is the control that you can get with it. You can adjust how wide or how narrow the beam of light that comes out of your flash and you can also rotate the flash head to point to the ceiling or wall to give your subject a nice fill.
If you’ve got a D90, D200, D300, D700, D3 or any camera that supports Nikon CLS (Creative Lighting System; it’s eTTL for Canon), you can control your SB-600, SB-800, or SB-900 remotely, directly from your camera. If not, then you can still do off-camera flash shooting with a flash cord or buy a poverty wizard (eBay remote triggers, Yong Nuo triggers, etc.). More on that in a bit.
Remote Triggering Your Flash
Now that you’ve got your flash, you’ll want to be able to trigger it even when it’s not sitting on top of your camera. You have several options: via a cord, optical slave, IR, or radio triggering.
The flash cord is the most straight-forward. You attach one end of the cord to your camera, and the other end to your flash, and that’s it.
You can buy an optical slave that can be triggered with your built-in flash. Take note however that the reliability of optical slaves decreases when you’re shooting in bright light or when there are other flash shooters accidentally triggering your flashes. Optical slaves are also line-of-sight triggered, so you can hide your flash behind a wall and expect it to fire. Then there’s also the problem of timing, but let’s not go there.
As I previously mentioned, if you have a CLS-enabled camera, you can control your SB-600, SB-800, or SB-900 directly from the menu of your camera. You can set the power settings for a channel and all flashes on that channel will fire at that power when they are triggered. Triggering is done via the built-in flash. Unlike the optical slave, the built-in flash fires a series of short bursts called the pre-flash. It’s actually sending out the information via infrared and syncs with all the flash units. It’s also more reliable than the optical slave because it relies on infrared signals, so it performs better in bright light and infrared bounces off walls better. If you don’t have a CLS-enabled camera, you can get an SU-800 commander unit to trigger your flashes.
Lastly, you can trigger flashes via radio triggers. There are varying price ranges of radio triggers. The most expensive of course is the Pocket Wizard, but a lot of professional photographers think the trade-off between price and performance is well worth it. Pocket Wizards can trigger your flashes thousands of feet away and are not line-of-sight, and their triggering dependability is way up there. On the other hand, if you’re concerned about burning your wallet, you can opt for something cheaper like the poverty wizards. These are triggers found on eBay and camera shops and have different brand names, many from China. Their reliability and range is very low compared to Pocket Wizards, but when you’re on a budget, it will do its job adequately.
Light Stands
Now that you’ve got your flash to trigger remotely, you’re now going to have to find a way to position them. There are lots of different ways: taping them onto trees (I have done this before), walls, or posts, or asking other people to hold them for you. But the “pro” way of doing this is through the use of a light stand. Light stands weren’t originally meant for small flashes; they were designed for studio strobes and that’s why studio strobes usually have a built-in mount that’s meant for a light stand. For small flashes, you will need to get an umbrella adapter to attach your flash to the light stand (guess what else they’re used to attach to?).
Umbrellas
With an umbrella adapter, you can mount a specially-designed umbrella to your light stand and flash. If you’re on a budget, no problem. You can use any old white umbrella and rig it to your light stand (I have done this too), or if you’re feeling a bit more DIY, you could cut off the handle. After all, the “special design” of a photographic umbrella is about not having a handle. There are two kinds of umbrellas: the shoot-through and the reflector. If you can get your hands on a two-in-one umbrella, that would be best.
Flash Gels
Snoots, Grids, and Gobos
Others
Bags
Eventually, you’re going to need more transport protection for your camera than your knapsack or messenger bag (and yet I still sometimes do this, but I digress). My Nikon F55D came with a Nikon camera bag. At the time, all I had was my camera and kit lens and my Cokin filters, so it was fine and dandy. A new camera body and a few lenses, I needed to upgrade so I could carry more stuff. So I got a Lowepro Toploader 75 AW. Aside from having padded compartments, being AW (all-weather), it had it’s own raincoat in case the weather goes South. Eventually, it got too small so I needed to upgrade. Thanks to the evil persuasion of my buddy Rommel, I got a Lowepro Rolling Computrekker AW. As is obvious with its name, it rolls around with wheels, but you can also pull out its backpack straps. And being an AW also, you still have some rain protection.Battery Grip
Jo Avila teaches, “If you wanna look more pro [and don’t have a pro camera body], get a battery grip for your camera”. Indeed, when you’re facing a client for a shoot, a D80 with a battery grip makes a HUGE difference than a D80 without. But aside from the porma factor, the battery grip’s actual purpose is to add an extra battery compartment so you can have longer shooting times. The battery grip also has another feature that saved me a few times: it has a AA adapter rack so you can put in 6AAs instead of the rechargeable lithium ion batteries of your camera. The first one was when I was going to Dos Palmas, Palawan. I was so excited about the trip that I left my battery at the charger back home. The second one was in a marathon shoot (not a marathon as in people running, but marathon as in a shoot that took forever), when I was shooting on-location and my battery went dead so I just had to find a convenience store nearby and pick up a pack of AAs.
Underwater Case
This one isn’t really an essential when you’re starting out. But when you hit the beach, being the only one that can bring your camera swimming really sets you apart from the crowd.


