 Last time, I taught you how to create a time-lapse video using FFMPEG and the Terminal or (GIMP for animated GIFs) in Ubuntu Linux. But not many people are comfortable using the command line. I for one certainly made that post so that I wouldn’t forget how!
This time around, I have a simpler, easier solution that won’t get your shutter fingers dirty using OpenShot Video Editor.
So what is OpenShot? Video producer Neil Chappell’s has this to say:
“Before OpenShot burst onto the scene, video editing in Linux was really missing an easy to use, full featured editor that could save and convert to nearly any format and had a decent set of transitions. Yes KDEnlive has been around for a good while and is up there with the best of them in the proprietary world, even if it is a little buggy, but it is simply too complex for a lot of people to use.”
Installing The Software
So let’s install the software we need! Open up Ubuntu Software Center, search and install the following programs:
- OpenShot Video Editor
- FFMPEG (If you haven’t already since the first timelapse tutorial)
- Thunar
Note: If you’re using an Ubuntu OLDER than Oneiric, follow these instructions first.
Note2: For those of you who want a quick command-line way of installing, type:
sudo apt-get install thunar ffmpeg openshot
Preparing Our Files
 First, copy all of your files into a convenient work directory and keep the originals somewhere safe.
Next, we’re gonna run Thunar. Thunar is a file manager for the XFCE desktop, but it has a really nice Bulk Renamer.
Click Add (the big green plus-sign) and select all of the pictures we’re gonna use.
For the settings, just follow the settings on the example image on the left and click Rename Files.
Notes: FFMPEG (which OpenShot uses) requires that the sequence starts with 0, and also that the filenames contain a text string in the beginning; you can change “img” to whatever you want, but you can’t omit it.
Importing into OpenShot
 Run OpenShot and click on File > Import Image Sequence.
A dialog box like the one on the left will pop up. The filename pattern should match your filenames. The %03d says that there are 3 digits in the filename pattern, so img%03d.jpg takes anything with a filename of “imgXXX.jpg”
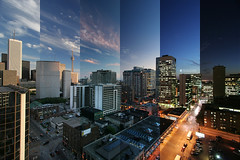
Now you can change the Frames Per Image setting to your liking. If you want to create a smooth time-lapse like The Mountain, you’d want to set this to something low, like 1. In my case, I just wanted to create a video slide-show from pictures I took using the Continuous mode on my camera.
Click Import Image Sequence when you’re done.
Moving Our Clip Onto The Timeline
 When the Import Image Sequence completes, you’ll see a single item in your Project Files tab. Drag this clip onto your timeline.
At this point, you can choose to add music, add other clips before, after, or over your time-lapse clip, or add effects. Otherwise, let’s move on the final step!
Export Video
 Click on File > Export Video to bring up the Export Video dialog box. On top you can change the file name and target folder of your video.
In the Simple tab, you can choose what kind of video format you want to export to. So far, I’ve used the Youtube-HD profile, but it’s pretty easy to tweak the settings in the Advanced tab. I use the Youtube-HD profile as a base and then change the Profile to HD 1080p.
Note: It will prompt you to install libmp3lame if you haven’t installed the Lame MP3 codec library yet, but it’s helpful enough to teach you how. Plus points for that!
So there you have it! I hope this guide is useful to you. For now, I leave you a time-lapse video of people splashing in the mud! Enjoy!:D


